| Instructions
for VX7000
If you don't
think the instructions here are detailed enough or if you have any trouble
with them,
check out this "AWESOME"
VX7000 Site . GREAT Tutorial here with screenshots!
Sites
to definitely check out if you have an LG VX7000
- http://www.s-c-u-m.com/cell/
This site is free for basic info but requires a donation to be a premium
member. WELL WORTH THE PRICE!
Learn to get unlimited wallpaper for $1.99
Instructions for TagTag
Reset Demo games from GIN
- AWESOME
VX7000 Site!
Another great site with lots of goodies. Please make a donation if
you utilize this site
- HowardForums.com
Free Forum. Lots of great information here for almost every Cell Phone.
To help keep these sites
free, please make donations to them. The authors of these sites put
alot of time and effort into them
and help us all greatly!
Installing
the Drivers - Prolific Cable (blob in the middle of cable):
- Purchase a USB cable if you haven't already. Get one (and other
cool stuff) here from eCity
Wireless!
- Driver installation can be tricky. It's very important that you
do not hook up the cable and phone to the computers USB port until
after you've installed the correct software driver in the next step.
- Install Driver by clicking this link. PL-2303
Driver Installer.exe This driver is in the root directory of
the Super CD.
- Hook up cable alone to a USB port on your computer
- The Windows New HardwareWizard won't run, you will see a small
window pop up in the bottom right hand corner of your screen with
the following sequence.
- Found New Hardware - USB to Serial Controller
- Found New Hardware - Prolific USB to Serial Controller
- Found New Hardware - Installed and Ready to Use
- At this point, it's finished and successful.
- The Operating System will not see the phone when connected. This
is very important. Many people email me saying the phone isn't detected.
When using a prolific cable, the phone is not detected by Windows.
You must install a software application to see the phone. See below.
Installing
the Drivers - Straight through USB Cable:
- Purchase a USB cable if you haven't already. Get one (and other
cool stuff) here from eCity
Wireless!
- Driver installation can be tricky. It's very important that you
do not hook up the cable and phone to the computers USB port until
after you've installed the correct software driver in the next step.
- Run the USBInstaller.exe
in the root directory of the CD.
- Hook up cable and phone to a USB port on your computer (phone
must be on)
- TheWindows New Hardware Wizard will start.
- If the wizard does not start did it ever start? meaning, if this
isn't the first time you've hooked up the cable, the wizard may
have ran and installed the driver already. If this is the case,
the wizard won't run again.
- Normal operation. This is what you should see when installing
the drivers.
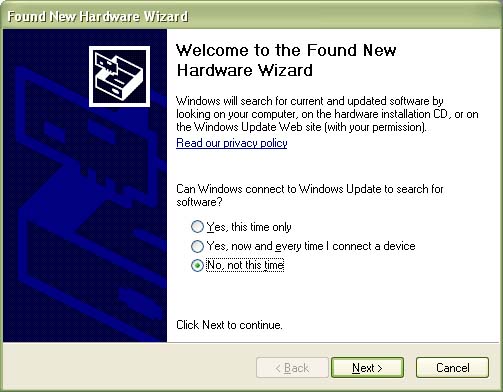
- The first window asks if you want to connect to windows update
to search for a driver.
Choose "no, not at this time" and click Next.
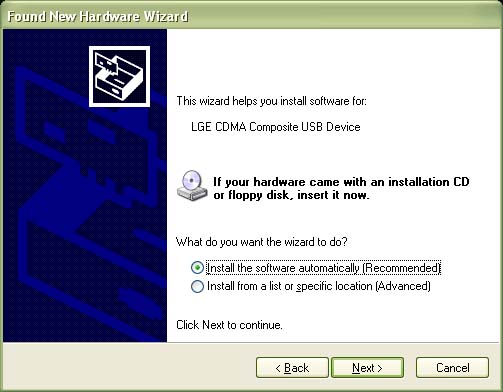
- The next Window will show that it's helping to install for a particular
device. Depending on the model phone you have, the actual device
listed may vary. Choose to Install the software automatically and
click Next.
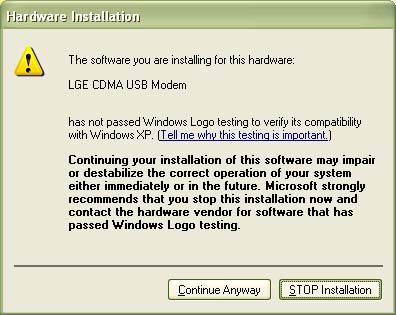
- You may receive the following message regarding windows logo testing,
ignore and and click "Continue Anyway."
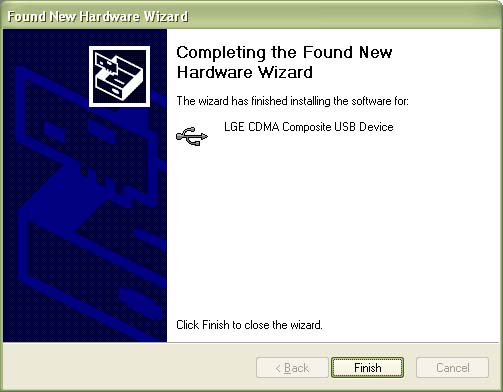
- The next screen shows that the wizard has completed. Click Finish.
- After you've completed that, depending on the model phone you
have, the wizard may start up all over again automatically. This
is normal. Just answer each prompt the same as above.The Wizard
may run 3 times and install each of the following devices:
- LGE CDMA Composite USB Device
- LGE CDMA USB Modem
- LGE CDMA USB Serial Port
- Once the Wizard doesn't run anymore, the drivers have installed
successfully.
Determining
the Port Straight through USB Cable:
Many people
that request support for this always skip this step. For any program
to talk to your phone, the program will need to know what COM Port is
assignned to the phone device in Device Manager
- Right Click your My Computer
Icon, select Manage
- Click on Device Manager
on the left
- On the right, click the
+ sign next to modems (you should see your phone listed there)
- Right click on your phone
and select properties
- Click advanced
- Click Advanced Port Settings
- You will see the COM Port
setting at the bottom (write it down, you will need it later)
Uploading/Downloading
Pictures & Wallpapers
You can use
Bitpim or QPST - Both programs are included as well as instructions
for both
BITPIM
7
Install
bitpim from the CD here.
Or, go to the bitpim
website and download the latest release.
When installing, if VX7000
isn't an options, choose the VX6000 phone (if asked to reboot, please
do so)
Installing
Wallpapers:
- Create "donor"
pictures that will be overwritten by Bitpim. To do this, activate
the "closed phone photo"
(hold photo button down for 3 sec while phone is closed) then press
the photo button a few more times.
When done, retun to the main menu screen.
- Make sure your phone is
plugged into the USB port and is on
- Load Bitpim - Select VX7000
mode
- Go to the "Filesystem"
tab. Navigate to "dload" folder, then "img". You'll
see a variety of BMP and JPG files listed.
- Make note of the the timestamped
pictures you just took.
- Right click on any fileand
click overwrite
- Choose the picture you
want to overwrite your "donor" file with and click "Ok".
- A progress bar on the
bottom of the window will show the upload status.
- Once the file is uploaded,
check it in your camera gallery, and rename it to whatever you want.
Main screen
resolution is 176x184
Front screen resolution is 96x80.
When exporting
JPGs from your image editor, use the highest quality output available.
Installing
Ringtones:
- Create "donor"
files as before.
- Record yourself saying
"test test test" into the phone about 10-20 times
- Connect your cable to
the computer and phone
- Load Bitpim and navigate
to the "Filesystem" tab, then "dload", then "snd.
- Choose the sound file
you want to overwrite with "donor" file.
- Rright click and choose
"overwrite"
- Upload your ringtone.
- Once the file is uploaded,
check it into your "Get It Now" > "Get Tunes and
Tones" section
and rename it to whatever you want.
Try to keep audio file to
30 seconds or less. Your phone most likely won't ring any longer than
that anyway so any longer
and you're just taking up space.
Files should be saved at
32kbps bitrate and 22.5kHz sampling rate mono. Your file size should
be 140kb or so
QPST:
To transfer files to and
from your phone (Including ANIMATED GIFS) always make sure your phone
is turned on and plugged in before starting QPST.
- Install QPST from the
Super CD by running Setup.exe
in the QPST folder.
- Connect your phone to
your USB Cable and PC.
- Click "Start",
"All Programs", "QPST", QPST Configuration"
- Click on the "Ports"
Tab: COM1 and COM2 will be listed already.
- Click on "Add New
Port"
- (This is where you will
need the Com Port setting you determined in the first step of these
instructions)
- Type COMx (X=port number
of your phone as found in Device Manager. into the Port and Label
fields and click "OK"
- Click the "Active
Phones" tab - your phone should show up within 10-15 seconds.
- At the top, Click "Start
Clients", then "EFS Explorer"
- From the phone selection
screen, choose your phone and click ok
- In a few seconds you will
see the directory structure of your phone.
Upload Wallpaper:
- Navigate to the "dload",
"img" folder
- Right click in the window
and choose "New"
- Browse to the gif or animated
gif file you want to load to the phone and click "OK"
- Next, go to dload dir
and delete image.dat
- Close EFS explorer and
Click "Yes" to reset your phone.
- This should reset your
phone. If it doesn't, please do it manually.
- The file will now be in
your picture gallery and can be used as wallpaper.
Add
a Ringtone:
- Navigate to the "dload",
"snd" folder
- Right click and choose
"Add new file"
- Click "Browse"
and select your ringtone which should be a .mp3 or .mid.
- Wait until the"Please
Wait" status indicator goes away.
- Navigate to "dload"
and delete "sound.dat"
- Close EFS explorer and
Click "Yes" to reset your phone.
- This should reset your
phone. If it doesn't, please do it manually.
- Now you have a new audio
file on your phone that can be used as a ringtone.
You can transfer
animated gifs into your images directory, then delete images.dat (this
will reset all your Caller ID images). Then reboot your phone and you
will have the animated gifs in your phone.
NOTE: The animation on the
images IS slower. The simpler the animation and the smaller the size
of the gif file, the faster the animation is. Also, do not set animated
gifs as Caller ID images, since they dont work.
You can also transfer
mp3s into your snd directory without using the Overwrite method. If
you do it this way, you have to delete sounds.dat, and that will reset
your Caller ID ringers. You can also use the Overwrite method with QPST
and that way you don't have to delete sounds.dat (in the dload folder).
QPST Overwrite Method:
Create a ringtone with the
same exact name as the one on the phone that you want to overwrite and
drag it into the QPST window.
It will then ask you "DO YOU WANT TO OVERWRITE?", say yes
and reset the phone. Once it's on your phone, you can rename it to whatever
you want. Just make sure to have the appropriate extension. If your
song on the phone ends with .qcp then make sure you name the song on
your PC with .qcp extension.
NOTE: The VX 7000 phone can
handle mp3 files without renaming them to .mid.
Transfer
files from your phone to your computer:
To save a file from your
phone to your computer, find the file on your phone, right click and
choose "copy from phone" utilizing the
following information to find the files.
Images="dload">"img"
Sounds="dload">"snd"
Videos="brew">"media" (its a ".3g2"
file)
Phone Book="pim">"pbentry.dat"
Anything related to calls="pim"
Alarm info="alarm">"alarm.dat"
Banner Data="eri">"eri.bin"
Removing
the Verizon Wireless Banner:
(USE AT YOUR OWN RISK)
- Load Bitpim
- Navigate to the /eri folder
and save the eri.bin file to your computer
- Make a backup of it -
VERY IMPORTANT! (eri.bin also on Super CD)
- Install and run Winhex
on Super CD
- Within the eri.bin file
look for the lines with "Verizon WirelessA" and Verizon
WirelessB" Place the cursor over
the V... and hit the space bar replacing all letters with a space
- Except for that trailing letter A or B.
Make sure to leave that part there.
- Now upload the edited
eri.bin file to your phone. To do this go to view filesystem again,
right click on eri.bin, and select overwrite.
- Once this is done, reboot
your phone, and the verizon wireless banner will be gone.
FREE
WAP:
( I pulled this from a forum and have not tried it)
WAP is a free internet alternative
to paying verizon $4.99/mo.
To set it up on your VX7000, do the following:
Update 12-01-04
Update 11-19-04
- The verizon IPs below
are not valid anymore. If you want to use Free WAP, you will need
to either find some other valid IPs or run your own WAP server on
your computer. To help you guys out, I have placed the WAP Server
software in the Tutorials section. It has instructions on how to set
everything up. Good luck.
Update 09-25-04
- You can now use other
WAP servers besides the Verizon one again. On this CD there is a file
called WAP_Server.zip
Install it to set up your own WAP server at home.
- You can always use the
Verizon's IPs below:
Enter the following information:
Press Menu, 0, 000000, go to WAP
Set these as follows:
Primary IP: 66.174.77.60
Primary Port: 8080
Secondary IP: 66.174.77.60
Secondary Port: 8080
Homepage: http://www.tagtag.com/blazer380
(To set up the Homepage,
press Menu, 0, 00000, 9, 4, and type in your homepage here and press
SAVE)
Note: You will now get the
$4.99 VZW advertisement whenever you start the browser. Just press Menu
when it comes up, and click on Home (Homepage).
Also recently the tagtag.com has been down, so try another homepage.
--------------------------
These are the old wap settings
that don't seem to be working now. I'm leaving them in here just in
case they work at some later time.
If you want to use free wap,
and not get the VZW $4.99 ad, do this:
Press Menu, 0, 000000, go
to WAP
Set these as follows:
Primary IP: 216.099.207.233
Primary Port: 8080
Secondary IP: 216.099.207.233
Secondary Port: 9201
Homepage: http://www.tagtag.com/blazer380
How
to use the Wireless Internet with Verizon:
You should have your phone
recognized as a device when you hook it up to your computer by now.
These instructions rely on you to be a little more independant than
other tutorials. .
Anything I say about Broadband (as far as instructions go) is complete
speculation.
Now that your phone is recognized
as a modem, it can be found in Control Panel>Phone and Modem Options>"Modems"
tab
Click on "Properties"
Click on the "Advanced" tab
This is what's called an initialization string. You can think of it
as a wake up call by your roommate, it may be "YO! You've got work!"
then you hop your ass out of bed, throw on your stuff, and head to work.
Or it may be "YO! Beer pong in the attic!" then you hop your
ass out of bed, and go play beer pong in your boxers.
The initialization string needs to match what's stated below for that
specific option to work... (if you try to use the QNC initialization
string with EN, it won't work)
For QuickNetConnect/Quick2Net(QNC):
AT$QCMDR=2
For Express Network/National Access(EN):
AT$QCMDR=3
I assume this is the initialization string for Broadband:
AT$QCMDR=4
Creating Dialup Connections with the Connection Wizard
This is an alternative to using the Verizon Dialer
Open Control Panel>Network
Connections>"File" menu>"New Connection"
Click "Next"
Click "Set up my connection manually" radial button, click
"Next"
Make sure "Connect using a dial-up modem" is selected, click
"Next"
Under "ISP Name" write either "QNC", "EN"
or "Broadband"
Set the phone number to #777 (for any of the three)
Next you need to enter a username...
QNC...
username: vzw
password: vzw
EN...
username: (xxx)xxx-xxxx@vzw3g.com
(replace (xxx)xxx-xxxx with your phone number)
password: vzw
Click "Next"
Click "Finished"
Speeds, Charges, and other unanswered questions...
What are the speed difference between the three wireless internet options?
QNC: 14.4 kb/s, capped
EN: 40-60 kb/s, as if you haven't heard WITH BURSTS UP TO 144kb/s
Broadband: 300-500 kb/s, only available in San Diego & Washington
D.C.
What are the charges for each options?
QNC: MOU* with every single Verizon Wireless account. No other charges
apply. *MOU: Minutes of usage, like making a phone call
EN: .60/min; or $79.99 for unlimited usage/month. If you still have
a copy of the contract you signed/look at your monthly bill under "Promotions
and Other Credits." If you see something that reads "EN MOU
n/c," then you're lucky. That's right, that translates out to "Express
Network, Minutes of Usage, No Charge." You can use EN for MOU.
Yippie! I don't have that provision. I did do a test two nights ago
by staying on for five minutes. Now I'm just waiting for my bill.
Broadband: $79.99/month
Remember to call the Tech Department at 1-800-308-DATA with any questions,
or to add any provisions to your account.
|
Get more great deals
from
eCity Wireless
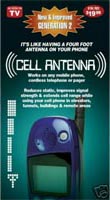
Antenna Booster
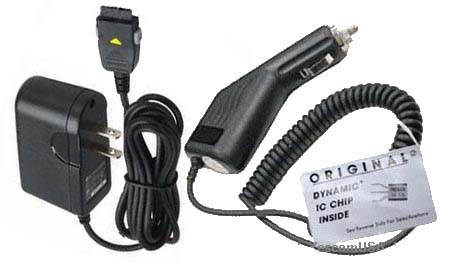
Car and home
chargers
Bluetooth
Devices
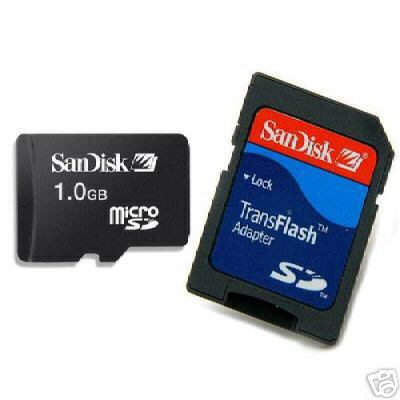
Memory
Cards
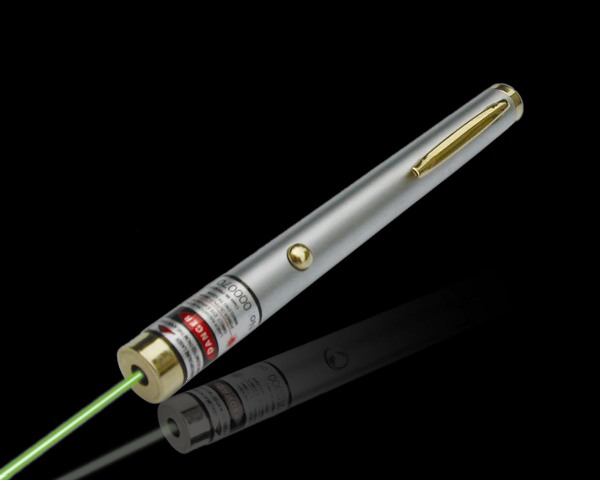
POWERFUL
Green Laser Pointer see the beam not just the dot at the end!
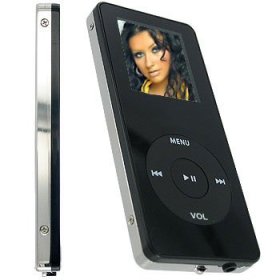
MP3/MP4
Players with FM, Games, video, etc.

Accessories
for your Harley
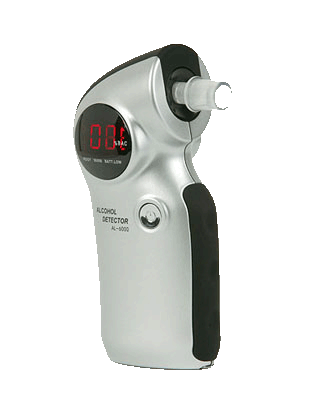
Digital
Breathalyzers
|


